How to use the app
Learn the app from these pictures. Every step is simple.
The numbers in the red circles match the steps below each picture.
1. Log in
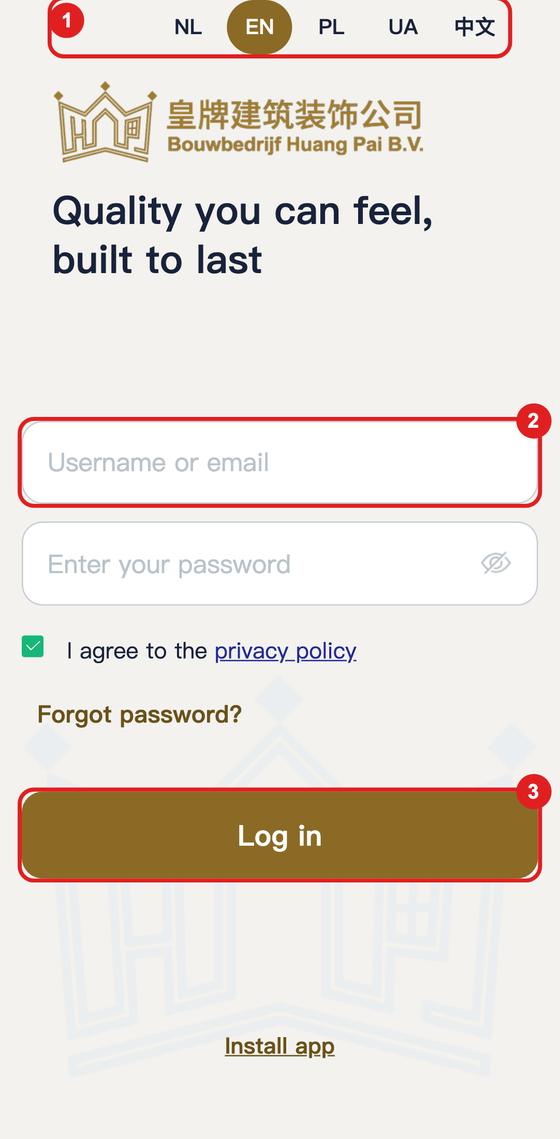
- 1Choose your language
- 2Enter the username and password from the company
- 3Tap Log in
2. Start work
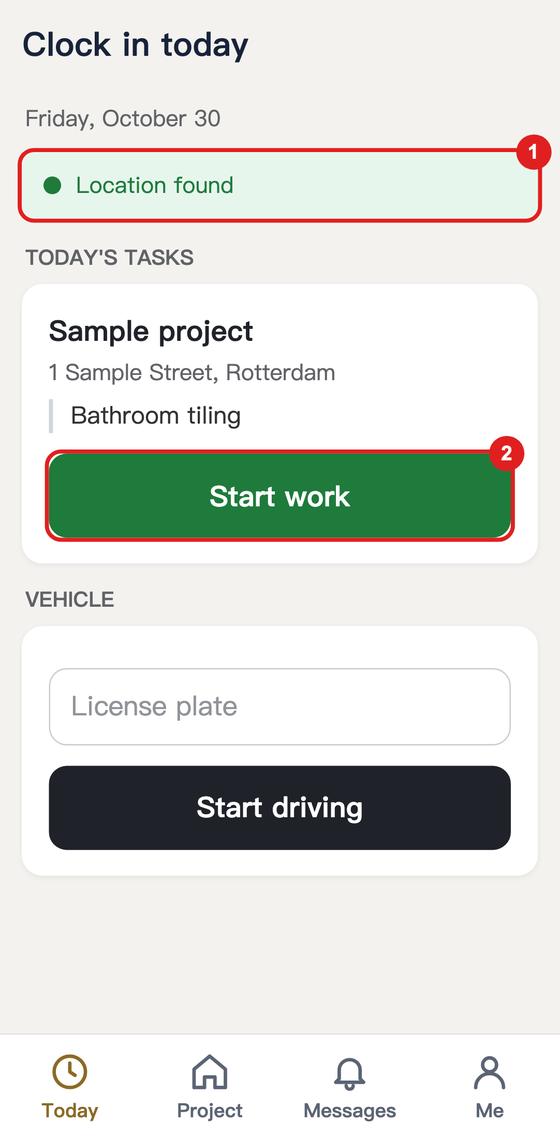
- 1Wait for the green location message. If your phone asks to use your location, choose “Allow”
- 2When you arrive at the site, tap Start work
3. Finish work
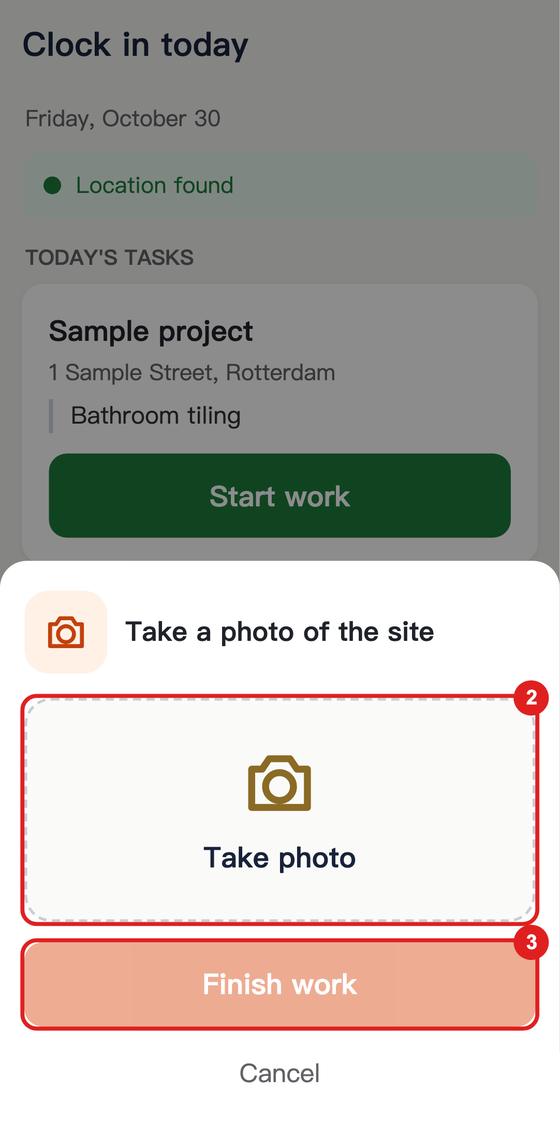
- 1When you finish, go back to Today and tap Finish work
- 2If you have not uploaded a photo today, tap Take photo and take a photo of the site
- 3Tap Finish work again. You are done for today
4. Vehicle
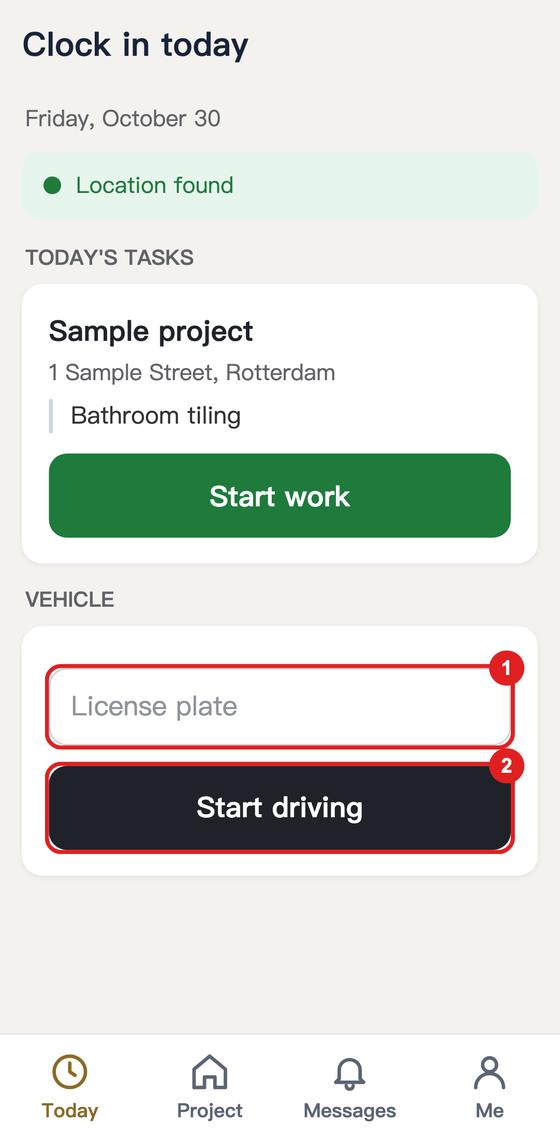
- 1Before you drive, enter the License plate
- 2Tap Start driving. When you arrive, tap End driving
5. My projects
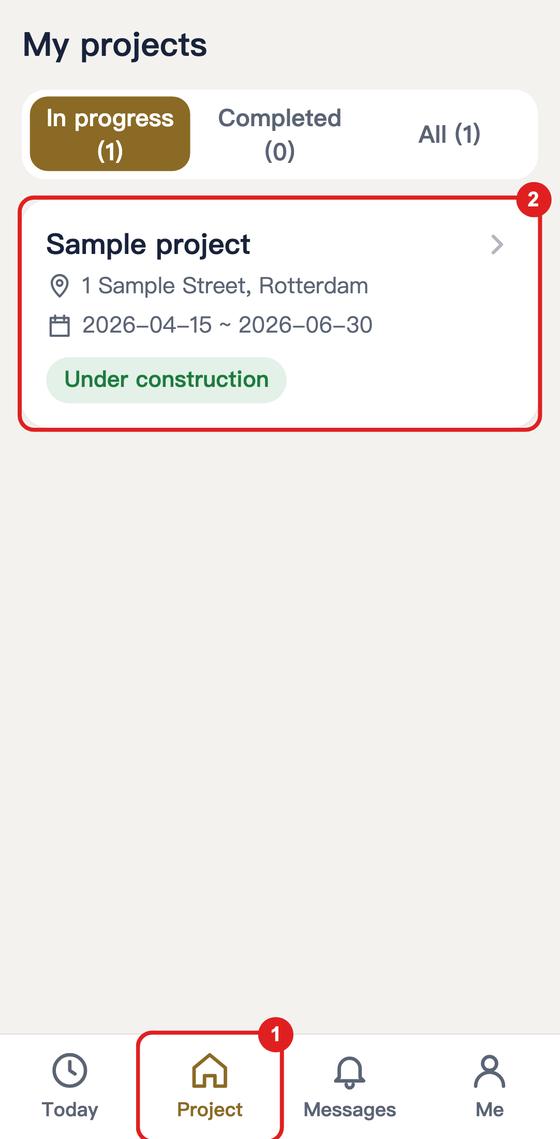
- 1Tap Project at the bottom
- 2Choose your project. Everything for that project is inside
6. Progress photos
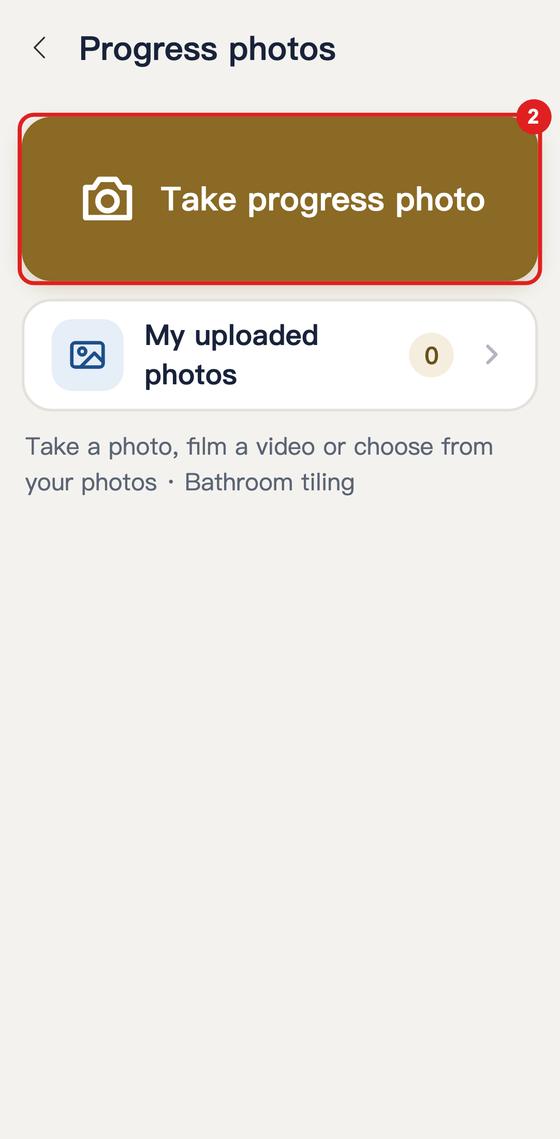
- 1In the project, tap Progress photos
- 2Tap Take progress photo. Take a photo, film a video or choose from your photos
- 3Tap Upload. If the network drops, it continues by itself. Wait until it finishes and keep the page open
7. Receipts
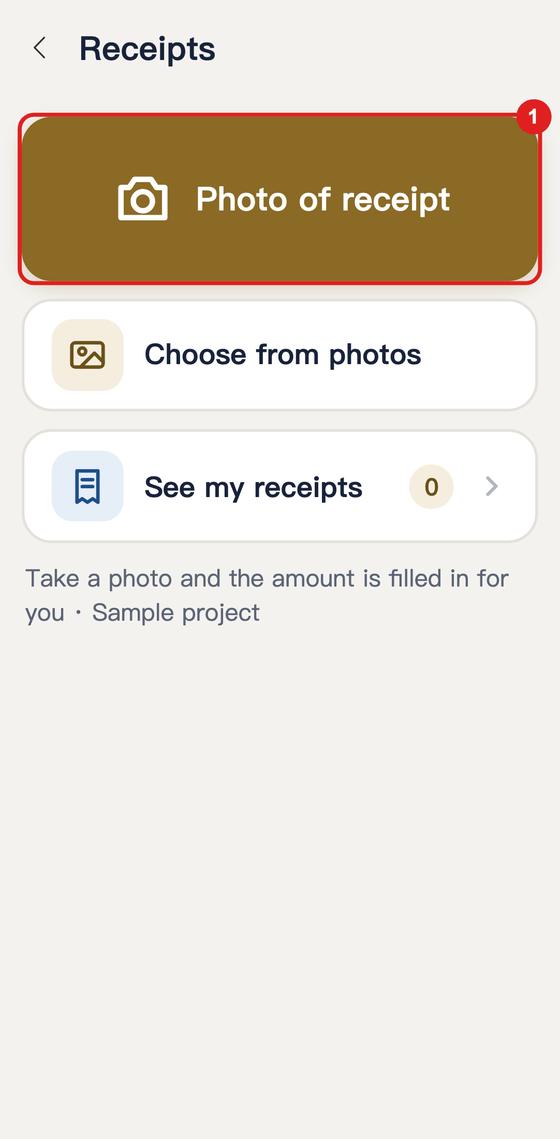
- 1Tap Photo of receipt and photograph the whole receipt clearly
- 2The amount is read automatically. Check it, then confirm
8. Leave
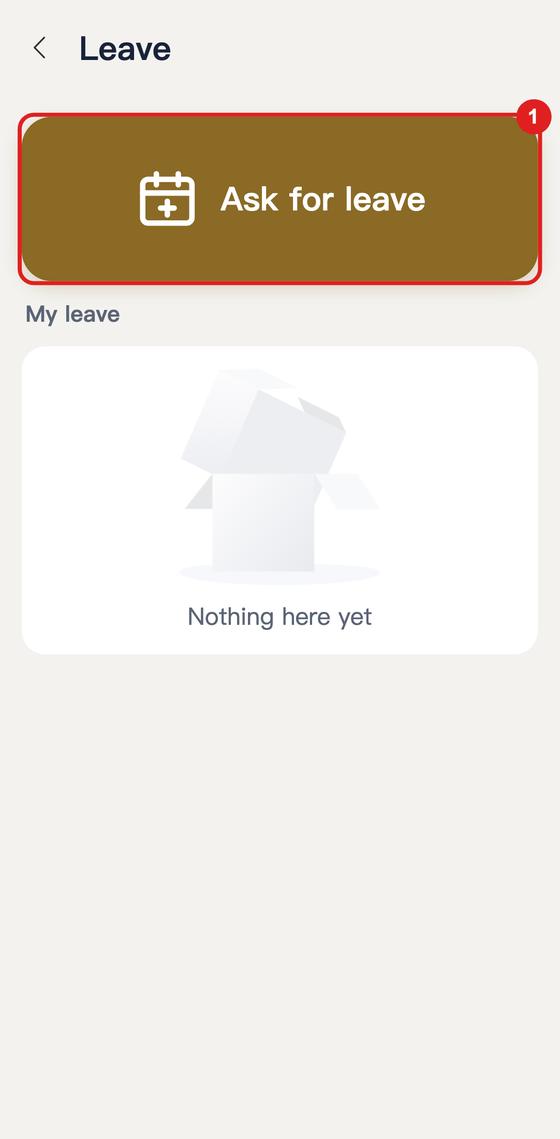
- 1Tap Ask for leave
- 2Choose the dates and the reason, then send
- 3The answer appears under My leave
9. Materials
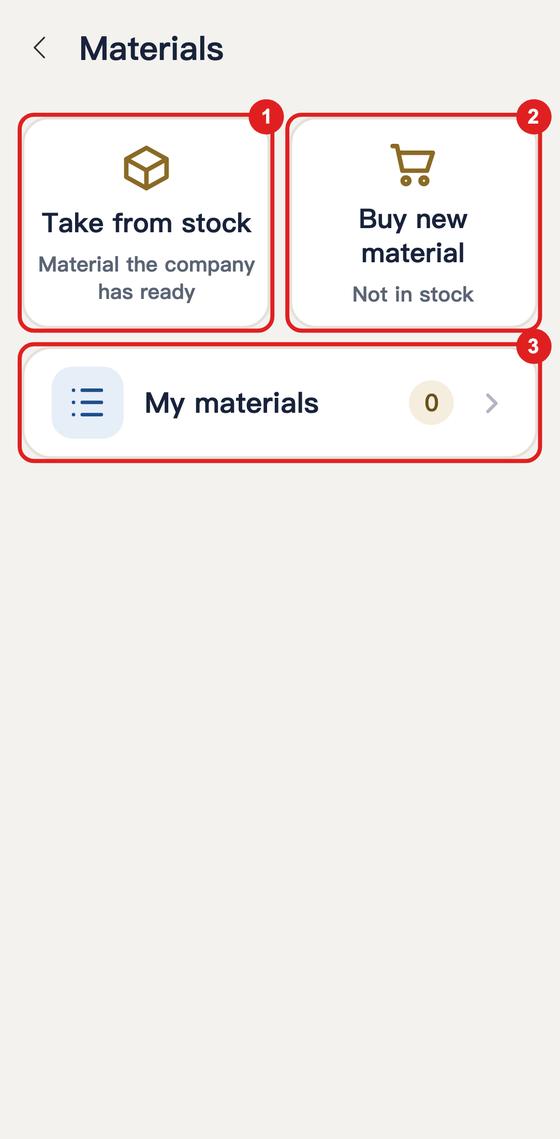
- 1Material the company has ready: tap Take from stock
- 2Material not in stock: tap Buy new material
- 3When it is ready, open My materials, tap Pick up and confirm with a photo
11. Messages and settings
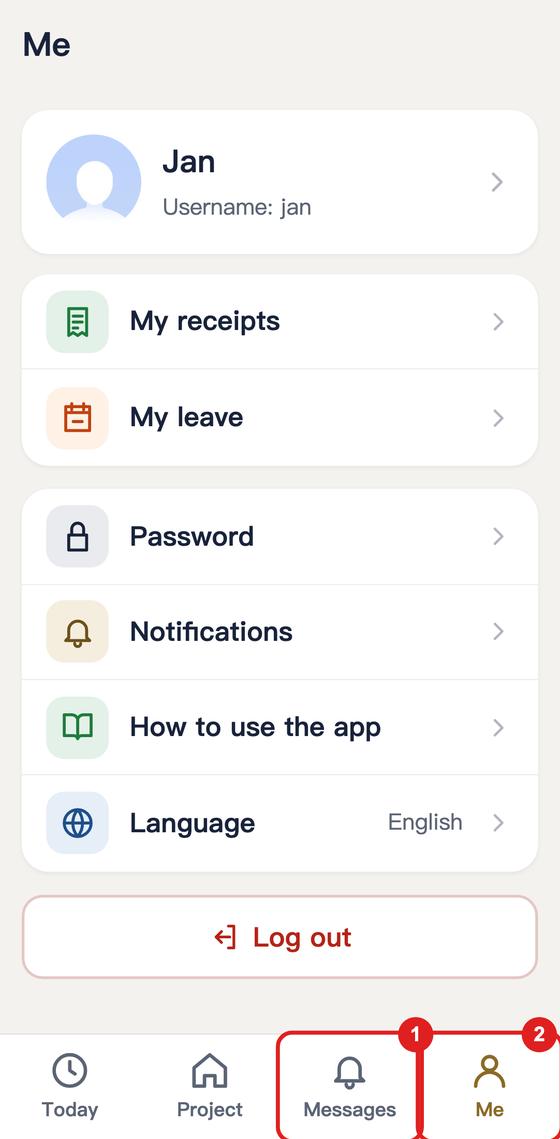
- 1Messages from the company are under Messages
- 2To change your language or password, open Me
If you have a problem, contact the office.
Log in